


In previous posts, we have covered the connection with DynaShape and Dynamo/Generative Design.
Those can be found here, Space Planning with Dynamo using GDIR & Space Planning in Dynamo with DynaSpace.
In this post, we want to demonstrate another example of creating Bubble Diagrams for a Clinic with Generative Design. (This post is a supplement to the webinar provided by Autodesk here).
Revit Requirements
Since we are using Generative Design in Revit, there are a few pre-Generative Design requirements for this workflow.
In order to visualize our Bubble Diagram, we will have to create a Revit Family to be used.
If it is your first time creating custom Revit families, there is more information available on Autodesk Knowledge Network.
Space Bubble Family Overview
Based on what a space planning bubble does, our space planning bubble family will have the following minimum requirements:
Parameter/Data Requirements
• Instance Parameter for Diameter/Radius of the bubble.
• Instance Parameter for the name of the department.
• Materials for departments. (In our example we pre-create 20 to choose from).
• Type Parameter for Material Assignment.
• Family Types that represent each department.
Geometric Requirements
• Model Text with Text Value assigned to the material type parameter
• Circle extrusion with depth/radius/material assigned to related parameters.
In addition to the above requirements, we have added a few optional items to the family.
Additional Optional Parameters/Data
• Text Size – For controlling the 3d model text height
• Text Depth – just in case we want the text to be thicker
• Bubble Depth – just in case we want the bubble to be thicker

End Result (Space Bubble Library)

space bubble parameters

pre-loaded materials (20 by default)

Model Text for Displaying Department Name

Bubble Dimension Parameters
Revit File Overview
With the space planning bubble created (and available in the dataset), we simply need to start a new project.
This workflow works based on selecting a room in the Revit model.
Note: DynaSpace does require the room to be convex and does not support concave layouts at this time.
This equates to not using any L-Shaped, U-Shaped, or Rooms with Cores at this time.

Proposed Layout as Room
Dynamo Graph Overview
User Inputs
With any Dynamo graph created to be used with Generative Design, we need to allow users to add inputs. This graph is no different and requires only 3 inputs.

Inputs for Generative Design
A new input type you may have noticed above is the “File Input” node. (input program file).
This is a new input type available in Generative Design for Revit v22.3.10. For more new features, check out this blogpost, Generative Design v22.3.10.
This is great because users can now create Generative Workflows that utilize external inputs from various files.
In this example, we focus on using a space program in excel, but this also supports .csv files, .txt files, and more!
(Note: in previous versions of Generative Design, you would simply need to hardcode the space program data in the graph)
Family Type and Material Collection
With our inputs created, we also have to collect the family types to use and the materials (colors) to use. This is achieved using a few out-of-the-box Revit nodes available in Dynamo for Revit.
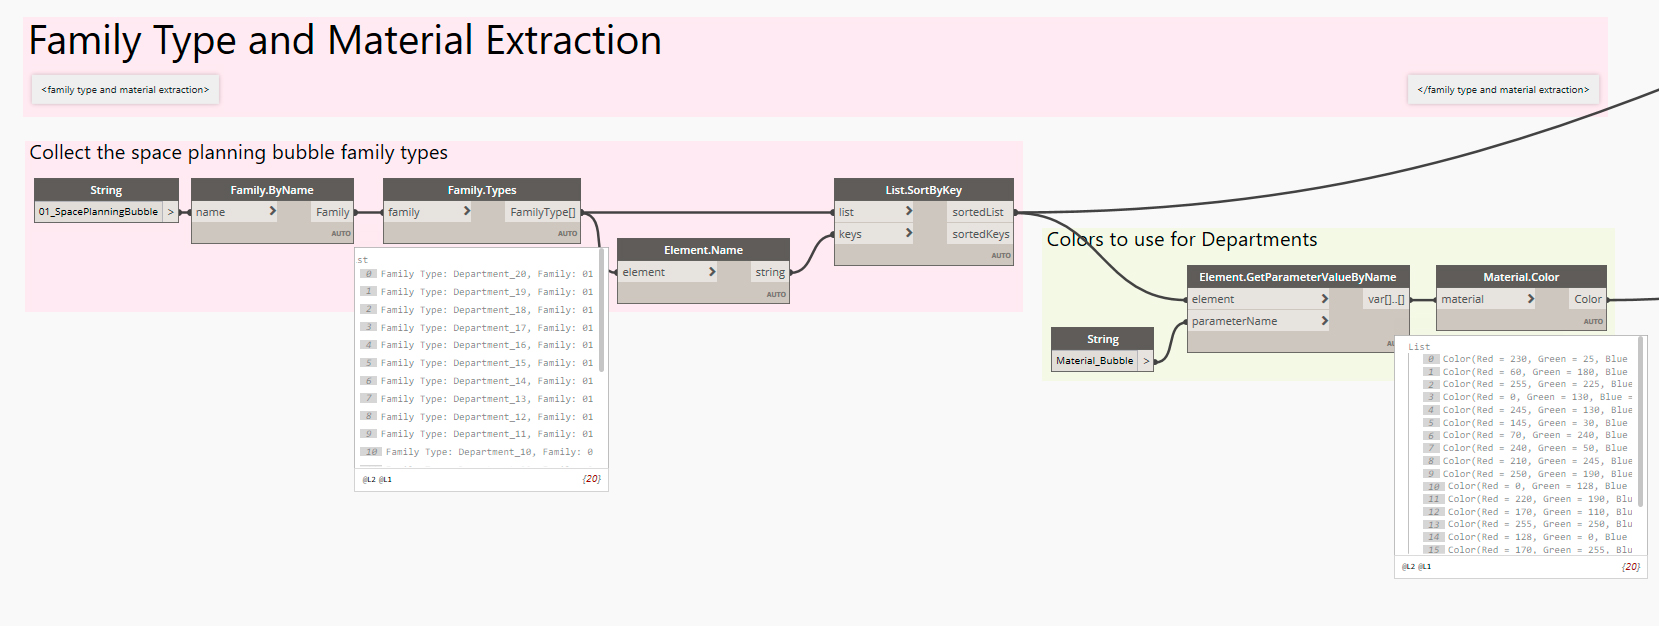
Collection of Family Types and the respective materials by Owner Family
Logic
With the inputs, family types, and materials in place, we need to produce solutions to evaluate in Generative Design. This portion uses the DynaSpace package.
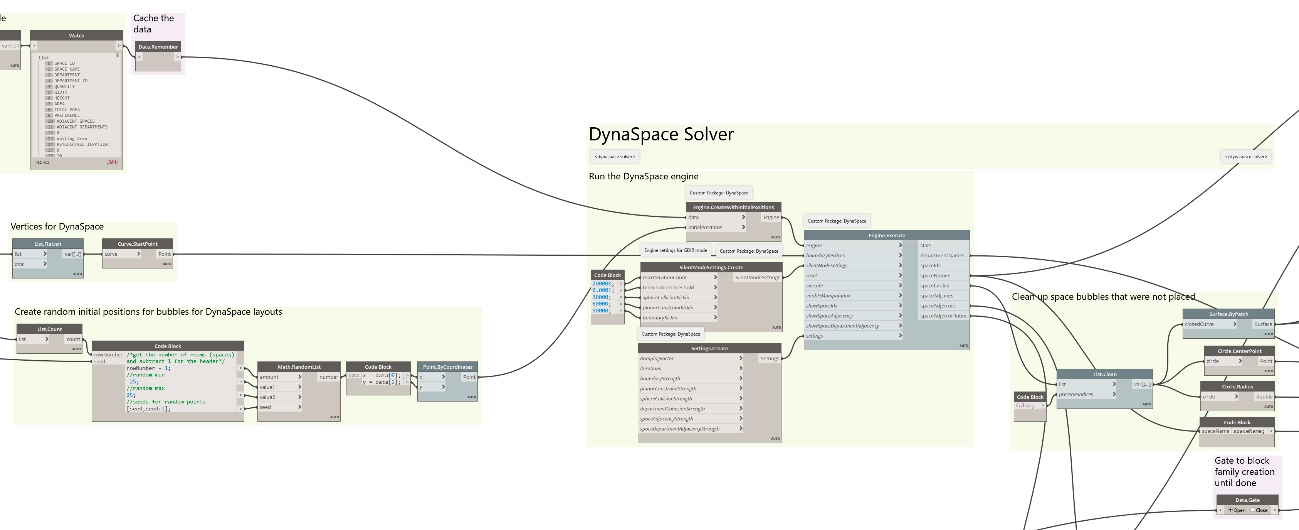
DynaSpace nodes for creating solutions
For a complete tutorial of the DynaSpace nodes and how to use them, please check out Long’s post here, Space Planning with DynaSpace.
Outputs
In order to use a Dynamo graph for Generative Design, we need to define outputs to evaluate. This workflow is simple because DynaSpace provides a few outputs for us. (Note: this workflow will use the randomize option in Generative Design because DynaSpace performs all optimization for us).

Outputs
Revit Element Creation + Parameter Setting
With the graph mapped out we have a section for placing family instances and setting the parameters.
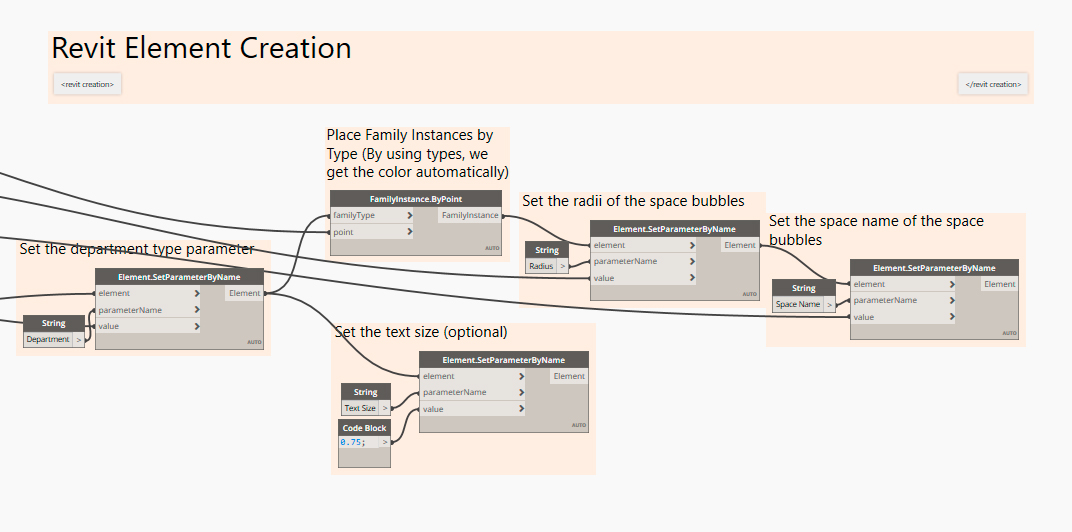
Setting Parameters for Bubble Family
For Revit element creation we use a Data.Gate node. This allows us to make Generative design “wait” to make changes to the Revit model. This is also exciting because it enables the “Create Revit Elements” button to be used multiple times. Even between design options!.

Create Revit Elements allows us to “commit” changes to Revit
If we simply add a few design options to our Revit model we can now iterate through our Generative results and load them into design options.

Creating Design Options for Run Results